OWLcard Mobile Checklist

Please make sure that all the following conditions have been met BEFORE you attempt to download your OWLcard.

OWLcard Mobile Checklist

Make sure that all the following conditions have been met BEFORE you attempt to download your OWLcard Mobile:

  1. You have an approved photo on file. Not sure? You can verify this in TUportal
  • Select Student Tools Tab
  • Select Get My TUid from the left-hand navigation.
  • If you see a photo of yourself on your OWLcard, you are good to go. If not, you will need to submit a photo or make an appointment to have a photo taken.
  1. New students must be registered for orientation or for the current/upcoming semester on a domestic campus.
  2. Your phone has NFC (specifically for Android) and it is enabled
  3. ApplePay or Google Pay is enabled

Apple iPhone Region setting is United States. ApplePay does not work in other regions.

  • Go to: General > Language & Region >Region and select United States

Apple iPhone Settings for ‘unrestricted access’

  • Go to: Screen time > Content & Privacy Restrictions > Content Restriction > Web Content and select unrestricted access

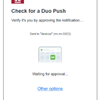
Be sure to set up Multi-Factor Authentication.

Checklist complete? Let's go to set up

OWLcard Mobile for Android

How to set up OWLcard mobile on Android: 

For Samsung phones please see Set-up for Samsung Galaxy Phone Users.

To set up your OWLcard on your Android, follow the steps below. The process will require that you download Transact eAccounts and set up Multi-Factor Authentication, if you haven’t already done so.

Important! Students must be registered for Orientation or Summer or Fall classes before the system will allow you to add OWLcard to you wallet.

Step 1: The NFC option is needed for OWLcard Mobile so you’ll need to enable NFC on your phone. To do so, go to Settings and look for NFC. Depending on your phone, it may be listed under Connected Devices, then Connection Preferences. Once you find it, turn on NFC. (If you can’t find NFC, your phone may not have this option.)

COnnection Preferences

Step 2: Next, open Google Pay to make sure it is enabled. If you don’t see Google Pay, go to the Play Store, search for Google Pay and install it. You don’t have to install a credit card when prompted. Just return to the Home screen.

Step 3: To continue, go to the Play Store, search for Transact eAccounts, download and install it.

Step 4: Open the eAccounts mobile app.

Step 5: Swipe through the four screens and tap Get Started.

Step 6:  Search for Temple University and then tap Temple Accessnet login.

Step 7: Tap Continue to sign in.

Step 8: Log in with your Temple AccessNet account and password.

Step 9. Next, you will see the following screen asking you to select your phone (device) and method. Continue to Step 10.


    Multi-Factor ID

    Step 10. Continue with the Multi-Factor Authentication request by selecting the phone and the method (i.e. Push Notification, Phone Call, or Text Message) you wish to use. Then go to your phone and approve the request for verification. Once you verify, you will see your Diamond Dollars account balance and student print quota account balance, if applicable.

    Tips for Using Your OWLcard on your Android:

    • Your phone screen must be awake. Then hold the middle of the phone near the top of the reader.
    • To display your OWLcard, open eAccounts, log in and then tap the small photo in the upper left corner.
    • Questions? For more information contact the OWLcard office at .